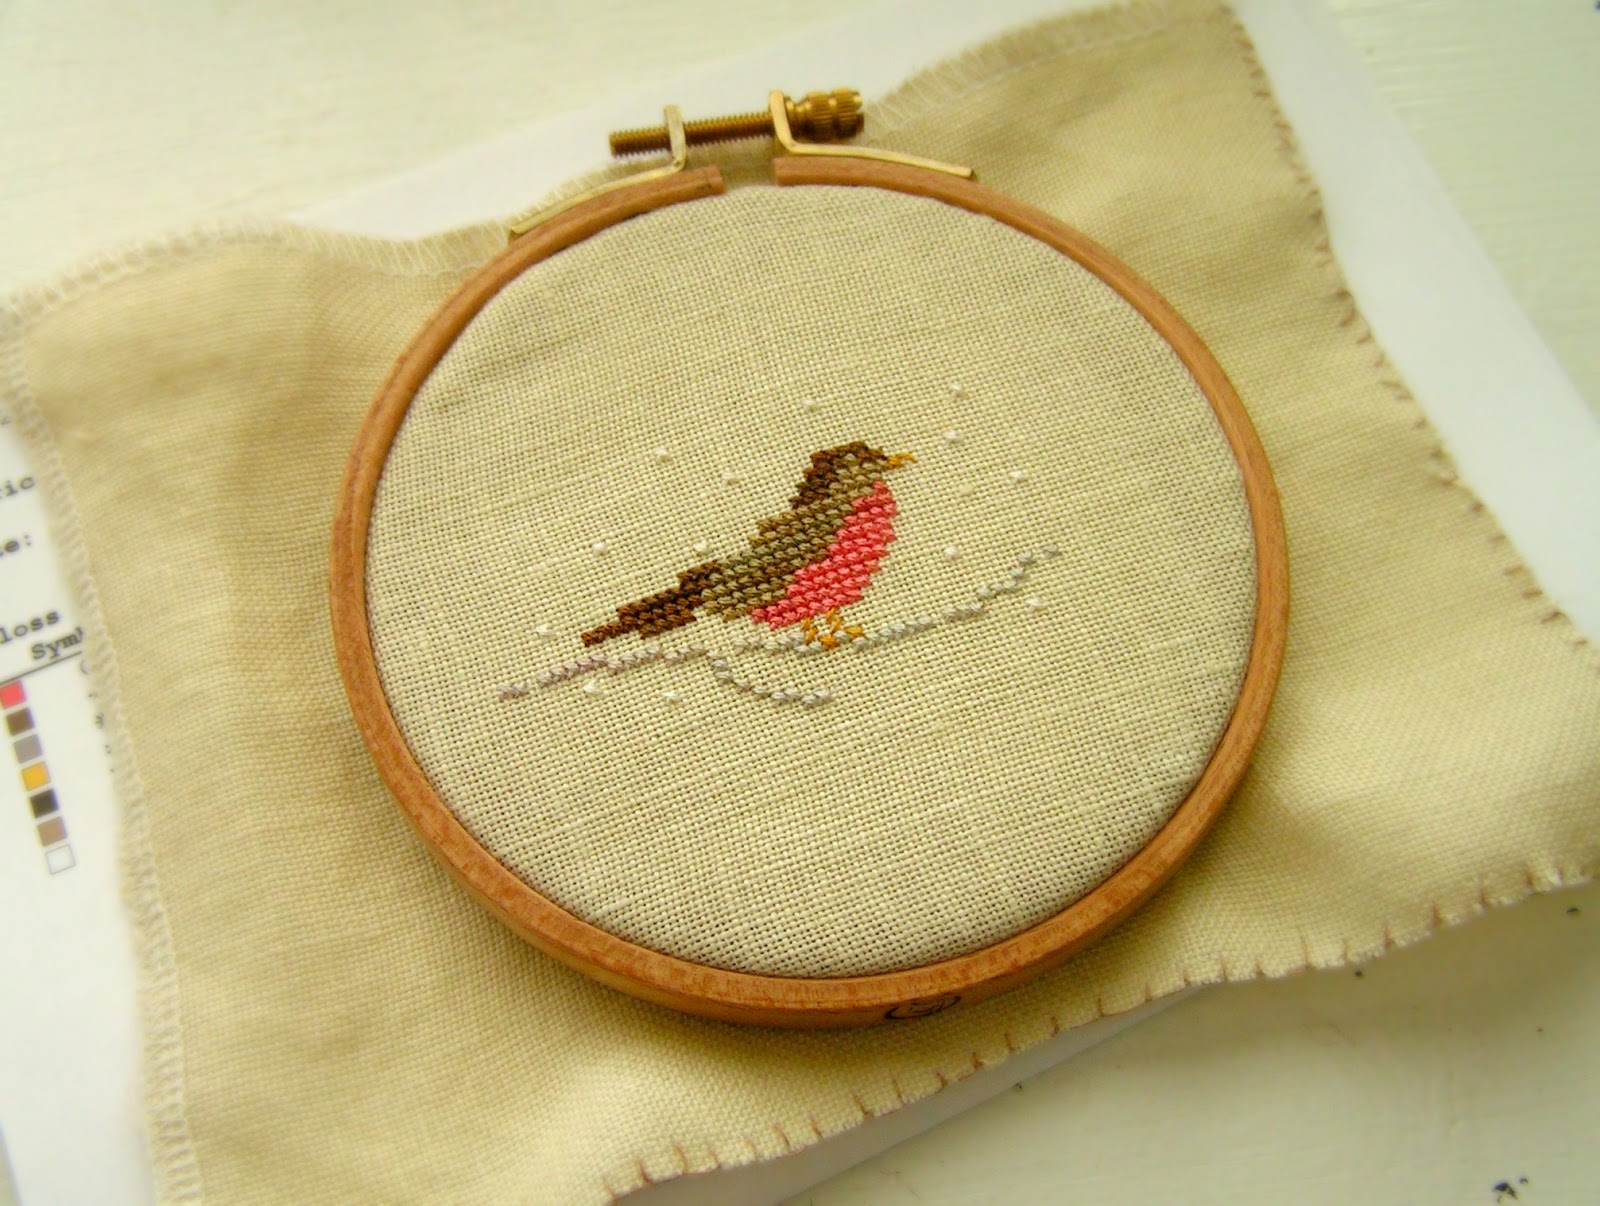
Showing posts with label Cross Stitch. Show all posts

Friday, March 2

weekending

Sewing away on a new bed quilt....


Stitching away on a cross stitch project....


Knitting away on a shawl and a sweater....


And enjoying a weekend of sunshine! Something we haven't seen in way too long!


Friday, January 12

crafty plans


January...how I love it! A fresh start, a whole new year ahead of you.

The planner/list maker in me gets very giddy with all that blank canvas to fill up. Of course, I also love having a quiet month with no obligations. Just cozy and quiet evenings at home, with plenty of time to think and dream. And I've definitely done some planning and some dreaming!

I've got several exciting plans for October House, but you'll have to wait to hear about most of those later in the year.

Right now, I'm thinking about what I want to make this coming year. Of course, that gets blended with what I plan to make for the business, but I've also got several purely personal goals in the making department. First up:

KNITTING
Namely, sweaters. I need/want more sweaters in my personal wardrobe. And so does Jimmy. So sweater knitting will be the big focus for this year. My eyes are always bigger than my stomach - so to speak - but these are the patterns I'm looking at:

Stitch Sampler Sweater by Holli Yeoh in the Fall 2016 issue of Vogue Knitting

Granito by Joji Locatelli

Classic Cardigan by Sandi Prosser in the Spring/Summer 2015 issue of Vogue Knitting

a cardigan for Jimmy (still looking at patterns)

Silver Leaf Cardi by Hannah Fettig in the first issue of Making

V-Neck Cardigan by Julie Wiesenberger in the Winter 16/17 issue of Vogue Knitting

A couple of new hats and mittens for each of us would also be nice


SEWING
I can't get enough of sewing right now, so I'm running with it! Besides quilting and hand work, I'm eager to get back to garment sewing. I used to be quite the seamstress back in the day. I even made a lined blazer and slacks that I loved.

Not much call for pantsuits in my wardrobe needs today, but I would love to make a couple of blouses, some tunics and see if I can remember how to make a decent pair of pants.

This is an ambitious list, I admit, but here goes:

2 blouses (I have ideas, but haven't found any specific patterns yet)

2 pair of pants

4 pairs of pajamas

2 bed quilts

2 lap quilts that can also be tablecloths

2 tote bags (Riverside Tote and The Townie Bag)

6 project bags

6 pouches

2 english paper pieced baskets

a handmade collar and harness for Riley


CROSS STITCH & EMBROIDERY
Most of my cross stitch plans are for October House patterns, so they're kinda secret, but obviously I'm having a lot of fun with the knitting themed patterns, so that will continue.

I also plan to introduce a few non-knitting things this year, including a couple of larger pieces.


Whew! I think I'd best get busy.


Friday, January 5

2017 recap

Here's a little recap of most of my makes from last year:


I can see that at some point, I stopped taking photos of finished socks. Because I finished several pairs with no picture of the sock or the WIP. I also haven't taken a photo of my finished Cloud Burst Cardigan, even though I've worn it a couple of times already. 

Nor I have I gotten a shot of my finished Hollows shawl, which has become my favorite knit of 2017. I enjoyed knitting every stitch of it. The yarn felt wonderful, the pattern was perfect and the finished object is getting a lot of use right now. It's so big and squishy, I can wrap it around my neck 3 times...which I need during these 20 degree days! It never falls off, and it just feels so dreamy.

I'm also wondering where my sewing projects are. I mean, I know where they are in real life, but they are missing from my photos. Basically, I haven't been great about photographing all my crafty projects. I tend to get the ones that relate to the business, but the purely personal projects don't get any screen time:)

Hopefully, I can change that, since I have a lot of sewing plans this year. Next time I'll talk about my making/creative plans for this year!


Monday, November 13

a knitter's sampler


Thank you so much for the wonderful response to my newest cross stitch pattern! I had a lot of fun designing and stitching this piece, and it's so gratifying that you like it too. I think a lot of us spend our non-knitting time thinking about knitting...a lot. At least, I know I do. There's always some kind of woolly thought running through my head!

We've got more knitting themed patterns coming in the months ahead! Here's a little sneak peak of what's coming up next:


I've got lots more ideas running around in my head, now the trick is to get them out and into some linen and thread:)


Friday, July 28

sneak peek

In all honesty, I've spent most of July covered in paint and sanding dust as I've been working around chez October House on several projects. And I'm not nearly done. Why is it that painting takes twice as long as I think it will?  Ah well, these walls, doors and furniture aren't going anywhere:)

I have, however, managed to get in some time designing a few new cross stitch patterns, one of which will be released next week:


A Country Day - or - if you prefer, A Summer Day. The chart includes both versions.  

I'm busy working away on a few more designs which won't be ready for a bit, but here's a sneak peek of one of them


You knew I had to design a pattern about my favorite craft!


Thursday, July 13

my cross stitch designs


We've got a new thing in the shop...our own line of cross stitch designs!

I have really been enjoying my cross stitching time these days, and I had a blast getting these designs stitched, photographed and ready for you to stitch. We've got 4 designs to start us off, but there are more coming in the weeks and months ahead.

There are 2 ways to purchase our designs. You can buy an instantly downloadable PDF pattern, or you can have a print pattern mailed to you...you choose which you prefer.

Hop over to the shop and see our newest designs!


Wednesday, June 21

holding my attention

Here are a few things that are holding my attention this week.

Knitting on this very calm and peaceful (yet addictive) sock makes me darn happy:


Still stitching along on this WIP, Little House Neighborhood. Along with this little peek at one of my own designs:


There's even some quilting happening - just a little bit each day, it wears my arms out!


And doing some very summer-y yarn dyeing:


Friday, May 26

lost in stitches


I brought back a new toy from PLY Away 2....a Clemes & Clemes stitching stand.


I learned to cross stitch in my teens, and kept at it occasionally throughout my twenties. In my mid-thirties I started a very small business designing cross stitch and quilt patterns. The business didn't last long, but my love of cross stitch and creating designs was cemented.

I abandoned my stitching for a while when I fell down the knitting rabbit hole, but a few years ago I picked it back up and worked on some pieces here and there. Then I started giving away small cross stitch patterns on my blog for a bit. 

Now, I'm lost in cross stitches again. Frankly, I blame Flosstube...and that's a good thing! I've had so much fun watching others share their cross stitch projects and plans. It's revved up my love for cross stitch once again!

So, right now, I'm working on an old WIP from Little House Needleworks (Little House Neighborhood), plus I'm stitching away on a couple of new designs of my own. 

You may be seeing more of this in the future:)


Wednesday, March 20

New Cross Stitch Design : A Country Day


Today is the first day of spring, so my celebration is this new cross stitch design, A Country Day!

I got the idea for this a while back, and it looks pretty much like I originally saw it in my mind.  I added the butterfly at the end, and I really love it.  The butterfly is stitched in 1 over 1, so I had to break out the magnifying glass to do that!


Update May 2017: This design will soon be available on my website: octoberhousefiberarts.com


Monday, March 4

March Free Cross Stitch : Faded Rainbow


I've got a wee little rainbow for this month!  This would make a great key ring, pinkeep, or thread tag.
Who doesn't enjoy a little rainbow now and then?  Especially when those cold March winds keep blowing!


Download here.


Friday, March 1

Cross Stitch Fabrics : A Primer


Since I gave my little rundown on threads for cross stitching, I thought it would be a good idea to do the same for the fabric that you stitch on.

Aida
This is the fabric most people are familiar with for doing cross stitch.  It's like 20lb copy paper...you can find it anywhere, it's cheap and it will work.  It's usually cotton or a cotton/poly blend. It is sized by the number of cross stitches per inch : 14, 16, 18 for example. However, much like copy paper, you can only do so much with it.  It's just not as versatile as linen, to my mind.  I was looking for a piece to photograph for this post, and I don't even have any around the house anymore.  Then I remembered a finished piece I had lying around :


Linen
This is what I use 99% of the time when cross stitching.  It's beautiful, strong, natural and comes in an endless variety of colors and sizes.  Usually when stitching on linen, you stitch "over two".  This means you make your cross stitch over 2 threads.  Linen is sized by the number of threads per inch.  My preferred size is 28 count, or 28 threads per inch.  Since I will stitch "over two" I will have 14 cross stitches per inch.  You can also stitch "over one" for very detailed work, or just in certain areas.


Evenweave
This fabric is what it sounds like, it has a very even weave with no thin or thick threads, as linen can sometimes have.  It's usually a cotton or cotton blend.  Aida is actually an evenweave fabric.  Other names for evenweave may be Jobelin, Lugana or Salem cloth.  If you dislike the look of Aida but aren't ready to try Linen, this is a great choice.

Hardanger
Similiar in appearance to Evenweave, Hardanger fabric is usually 100% cotton and a 22 count fabric. Made especially for Hardanger embroidery, it works fine for cross stitch.

Waste Canvas
Use this when you want to apply cross stitching to a fabric that would be difficult to stitch on, such as denim, knitted fabric, quilting or patterned fabric.  As the name implies, you layer this over your chosen fabric, stitch the design, then pull out the waste canvas, leaving the design on your fashion fabric.

Paper
Perforated paper is available for stitching small items like bookmarks or ornaments.  It's usually 14 count, and available in a variety of colors.

Wood & Plastic
You may have seen wooden pendants that have been cross stitched.  I've only seen these on Etsy, and they are adorable.  I've also seen plastic iPhone cases that can be stitched on.

What's your favorite fabric for stitching?


Monday, February 11

February Free Cross Stitch Pattern : HeartFlowers

February free cross stitch pattern

February...month of valentines and hearts, red and pink.  Why fight it?
Of course, the good thing about these "heartflowers" is they can change color with the seasons.
Red for February, yellow for May, brown for October.  Stitch one or three, or ten!

February free cross stitch pattern

Download the free pattern here.

Heartflowers February Free Cross Stitch Pattern by Robin Sample


Friday, February 8

Cross Stitch Framing : The Pin Method


So far, we've seen how to prepare a finished piece of needlework for framing, and how to finish it with the lacing method.  Today, it's the pin method.

The Pin Method
The pin method is just what it seems, using straight pins to pin into a piece of foam board.  This is quicker than the lacing method, but it's harder to do any adjusting once it's pinned.  I used a very small needlework to do this with, and I highly recommend that for your first pinning job.  It makes it very easy!

You'll need :
Your finished cross stitch piece
A piece of foam board, cut to size needed  (I used 1/2 thick foam board...it's what I had!)
Thumb tacks or push pins, and Straight pins (with a flat head)
Ruler


Measure and Cut
Cut your foam board to the size needed to fit in your frame.  (I use an old rotary cutter for this.)  If your needlework needs to be trimmed, do it now.  Have your thumbtacks or push pins handy.

Center and Tack
Center your cross stitch piece on the foamboard.  I held mine up to the light.  Place a thumbtack in the center of each side as shown above (this is to temporarily hold it in place).

Pin Away
Begin placing pins about every 1/4 inch or so along each side, removing the thumb tack last and replacing it with a straight pin.  Do this all the way around your board, taking care to smooth and stretch the fabric as you go.  Make sure you don't pull too hard on one side, or you'll slightly pull your design off center.


Fold and Frame
Everything should be pinned, except the corners.  Fold the corners around to the side and pin, as shown in the photo above.

It's ready for your frame.  If your foamboard keeps the back of your frame from fitting, you can cover it with brown kraft paper.  Place double sided tape around the edge of the frame, lay the paper down and trim the edges.  This will keep the dust out.

Or, if you're like me, you might be switching these out for different designs, and you're not too worried about the back!  Just don't let anyone peek back there.


Wednesday, February 6

Cross Stitch Framing : The Lacing Method


The Lacing Method
I admit, this is the method I usually use to finish my pieces for framing.  It works great, you can fiddle with it a little bit, and it doesn't damage the piece.  Five years later, if you decide to unlace it and make it into a pillow, you'll be able to do it.

This is a great method for larger pieces of needlework, but it's great to learn on small pieces!  So here we go:

Supplies
Your finished and pressed needlework piece
A frame of your choice that is the correct size for the item
Matte board (or foam board)
A rotary cutter, mat and ruler
Strong cotton thread (I prefer to use a glazed quilting thread)
A sewing needle and scissors

Check the fit
First things first, double check your frame size.  Make sure the finished piece fits inside the frame area with at least 1 inch overlap on all sides.  You'll need the overlap area to lace into.


Cut your matte board (or foam board) to the size of the picture area (mine is 3 1/2 x 5 inches).  You want a snug, but not too tight fit.


 Center and Pin
Lay your needlework face down and place the matte in the center.  Push a couple of pins into each side to hold it in place.  Flip it over and make sure your embroidery is centered.  You may need to fiddle with this a little bit to get it straight and even, but there will be room for final adjustments later.


Begin Lacing
Leaving the pins on each side, thread your needle with a nice, long, doubled length of thread with a good size knot in it.

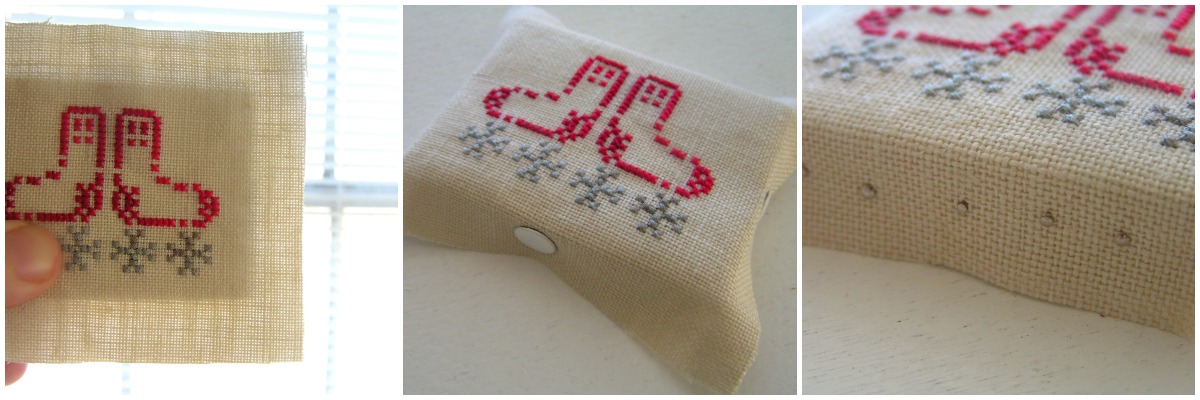
Starting at the top right corner, bring your thread underneath the overlap and through the fabric, about 1/2 inch from the edge.  Run it across the board to the other side and up through the fabric, then back across.
You can see how it looks in the photo below :


Continue lacing down the sides, pulling the thread taut.  If you run short of thread, add another length with a knot (it doesn't have to be pretty, just secure).  Continue to the bottom edge.

Now, go back and pull each strand taut, working your way down toward your needle.  You'll be surprised how much slack you pick up!  Holding the last strand in place with one hand, take a couple of stitches in the bottom corner, knotting each time.  Tie one final knot and cut the excess thread.

Repeat this process for the remaining two sides, removing the pins as you come to them.  You'll need to fold in the corners slightly, so they don't overhang the front edge, as shown below :


Final Adjustments
You'll find with this method that you can "scooch" the fabric every so slightly if it is out of kilter.  Flip your piece over to the front, and check your alignment with your ruler.  If it's a wee bit wavy, gently "roll" the fabric straight with your fingers.


Insert it into the frame and replace the back.  Done!


Next up :  The Pin Method


Monday, February 4

Cross Stitch Framing : Prepping Your Needlework Project


Adorable as they are, those little cross stitches can start to pile up, can't they!?

I like to stitch a few, then finish them as a group.  But how to finish them?  Of course, you can frame them...that's easy.  No wait!  How do you frame a cross stitch piece so that it's centered, stretched and tidy?

Framing Your Finished Needlework

Now, back in the day (and I guess some folks still today) you completed your cross stitch, took it to the needlework shop, picked out a custom frame and mat, forked over a bunch of money, and left it.  You came back in a couple of weeks and picked up your professionally finished and framed piece.

I'm a frugal sort of gal, so that never really set that well with me.  There are tons of cute and affordable ready-made frames out there.  Why can't I use one of those and just do the finishing myself?  Well, you can.

There are 2 methods for doing just that :  The Pin Method, and the Lacing Method.  I'll go through each one this week, but you start out the same way for both methods.

Prepping your Finished Needlework for Framing

I don't know about you, but here's how my pieces can look when I finish stitching them :


Kinda crinkly, wrinkly.  So first thing, get those wrinkles out!

Press It
Set your iron to either cotton or linen, depending on the fabric you've used.  Next, place a nice fluffy towel on your ironing board or pad.  This is what you'll lay your finished work on to press it.  Lay the right side down on the towel, and press.

And I do mean "press."  Don't run your iron back and forth over your work.  Press down in one spot for a couple of seconds, lift the iron up and move to a new spot and press.  Continue until the entire piece is pressed and wrinkle free.  Now is also the time to look for, ahem, pet hair.

Test Your Threads
For stubborn wrinkles, mist a little water, then press.  Be careful!  Make sure your threads are colorfast before throwing water and heat on them.  That's an easy way to ruin a beautiful cross stitch piece.  Always test your thread by itself if you have any doubts.  Reds are notorious for being a little "leaky".

After you've pressed the piece, you should see a nice little indentation in the towel where your stitches were.  Flip your piece over and you'll now have a nice unwrinkled piece of needlework.

Notice how the stitches "pop up" from the fabric.  That's why you use a thick towel.  It creates a great little relief effect.

Now you are ready to stretch your work and prepare it for framing, either by the pin method or the lacing method.


Next Up - The Lacing Method!


Wednesday, January 16

January Cross Stitch Freebie : Winter Bird


I'm enjoying these little cross stitch smalls...I hope you are too!  I'm probably going to keep this up for the rest of the year.  I've got several ideas perking around in my head, and they're fun and easy to stitch.

This little bird is a super quick stitch and very cheerful for your soul.  Really.


In the not too distant future, I plan on showing you several different ways of finishing these little stitcheries.
If you've got any good ideas, please share!

Download the Winter Bird Free Cross Stitch Pattern here.


Friday, November 30

Cross Stitch Free Pattern : Winter Wool Socks

I whipped up a new little cross stitch over Thanksgiving weekend :


Wool socks just make you feel better, especially if they are hand knit!  But, even if you don't have time to knit socks, you can stitch up a few quick as a wink.


I have a basket for our non-superwash socks in the laundry room.  I pile them in there until I'm ready to hand wash a batch of them.  I think this new little piece will make a great label for the front of the basket.
And the little one would make a great tree ornament, don't you think?

Download the free pattern here.  

The large sample was stitched on some unknown linen (probably about 24 count).  The threads I used are :  Dungarees, Buckeye Scarlet, Shutter Green, Oatmeal and Maple Syrup, all by Gentle Art Sampler Threads.
And the small was on Lakeside Linen 32 count Pearled Barley with Buckeye Scarlet & Banker's Grey threads.  But pick your favorite colors and stitch one up!


Related Posts Plugin for WordPress, Blogger...